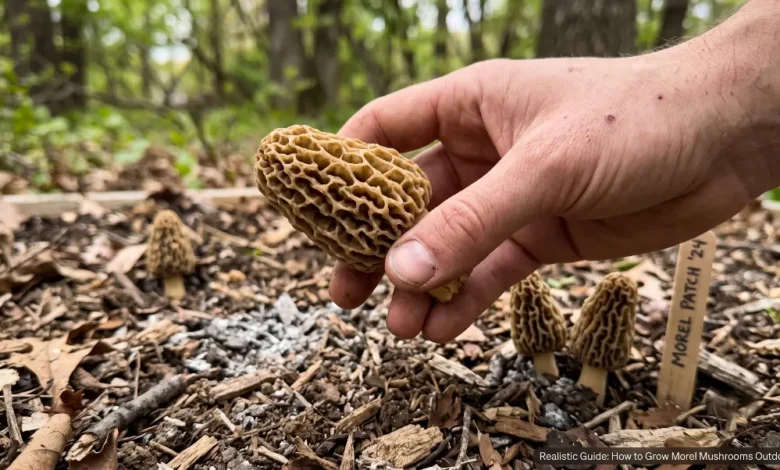
7 Steps to Grow Morel Mushrooms Outdoors (Realistic Guide)
Want to learn how to grow morel mushrooms in your backyard? You are in the right place. Cultivating morels is notoriously difficult because they require a complex relationship with specific tree roots and exact soil conditions. However, creating an outdoor spore slurry gives you the best chance of growing these prized fungi at home. We will walk you through the exact steps to prepare your soil, make the slurry, and care for your new mushroom patch.
To grow morel mushrooms successfully outdoors, create a spore slurry using fresh morel caps, non-chlorinated water, and a simple sugar source like molasses. Pour this mixture over prepared soil mixed with wood ash and peat moss near a dying elm, ash, or apple tree. Keep the area consistently moist and shaded throughout the year.
Key Takeaways
- Morel mushrooms need specific host trees like elm, ash, or apple to grow.
- An outdoor spore slurry is the most reliable DIY cultivation method.
- Soil preparation using wood ash and peat moss creates the ideal habitat.
- You must use non-chlorinated water to keep the mushroom spores alive.
- Patience is required since a morel patch can take one to three years to produce fruiting bodies.
Why Growing Morels is Different
Most mushrooms you find in a store grow easily on dead wood, straw, or sawdust. Morels are different. In the wild, they form a symbiotic relationship with the root systems of living or recently dead trees. This means you cannot just plant a morel in a pot of potting soil and expect it to grow. You have to recreate their natural forest floor habitat.
The Spore Slurry Recipe
The best way to introduce morels to your yard is by making a spore slurry. This liquid mixture suspends millions of microscopic spores in water, giving them food to start growing.
Here is what you need to gather:
| Ingredient | Quantity | Purpose |
| Fresh or dried morel mushrooms | 2 to 3 large caps | Provides the spores needed for growth. |
| Non-chlorinated water | 5 gallons | Acts as the carrier liquid. Chlorine kills spores. |
| Molasses or plain sugar | 1 tablespoon | Feeds the spores so they can germinate. |
| Pinch of salt | 1/4 teaspoon | Prevents unwanted bacteria from taking over. |
7 Steps to Create Your Morel Mushroom Patch
Follow this simple process during the late summer or early fall to establish your patch before winter arrives.
1. Find the Right Host Tree
Look around your yard for an elm, ash, tulip poplar, or old apple tree. Morels thrive near trees that are slowly dying or dropping their bark. The roots of these specific trees provide the nutrients the underground fungal network needs to survive.
2. Prepare the Soil Bed
Clear a four-square-foot area near the base of your chosen tree. Remove grass and weeds. Mix in a healthy amount of peat moss and hardwood ash. Morels prefer loamy soil with a slightly alkaline pH, and wood ash helps recreate the conditions found after a natural forest fire.
3. Blend the Spore Slurry
Place your morel mushrooms in a food processor with a few cups of your non-chlorinated water. Pulse the mixture until the mushrooms are completely chopped into tiny pieces.
4. Mix and Rest the Liquid
Pour the blended mushroom mixture into a clean five-gallon bucket. Fill the rest of the bucket with the remaining non-chlorinated water. Stir in the molasses and salt. Cover the bucket with a breathable cloth and let it sit in a cool, dark place for 24 to 48 hours. This resting period allows the spores to wake up and start growing.
5. Pour the Mixture
Take your bucket out to the prepared tree site. Give the slurry one final stir, then slowly pour the entire five gallons evenly over the cleared soil bed.
6. Cover and Protect the Bed
Cover the soaked ground with a thin layer of natural hardwood wood chips or fallen leaves from the surrounding area. This layer locks in moisture and protects the delicate spores from direct sunlight and hungry birds.
7. Wait and Maintain Moisture
The waiting game begins now. The soil must remain damp but not soggy. If your area experiences a dry spell, gently water the bed with a hose attachment. You likely will not see mushrooms the following spring. Most patches take at least two years to establish a strong enough underground network to produce mushrooms.
Experience Signals for Success
When preparing your slurry, pay attention to the water. City tap water contains chlorine that will destroy your spores instantly. If you cannot buy distilled water, you can collect rainwater or leave tap water sitting in open buckets for 48 hours so the chlorine evaporates.
Additionally, observe the trees in your yard closely. If an elm tree is actively peeling its bark, that is a prime location. The decaying root system releases carbohydrates into the soil, creating a perfect feeding ground for your morels.
A Common Mistake to Avoid
The most frequent mistake beginners make is treating morels like oyster mushrooms. Many people buy “morel growing kits” online that consist of an inoculated sawdust block, expecting to grow them on a kitchen counter. True morels require a complex outdoor soil ecosystem and changing seasons (a cold winter followed by a warm, wet spring) to trigger their fruiting cycle. Keep your project outdoors.
Learning More About Mushroom Foraging
Before growing your own, you might want to learn how to identify wild morels safely. False morels exist and are highly toxic. We highly recommend reviewing identification guides from reliable sources.
Penn State Extension offers excellent resources on safely identifying wild mushrooms and understanding forest ecosystems.
Conclusion
Growing morel mushrooms outdoors requires a specific environment, a simple spore slurry, and a lot of patience. By choosing the right tree, balancing your soil with wood ash, and keeping the ground moist, you significantly increase your chances of a spring harvest.
Next Steps:
- Scope out your yard to identify potential host trees like elm or ash.
- Collect clean wood ash from a fire pit or fireplace to prep your soil.
- Save a few mature morels from your next foraging trip or farmers market purchase to create your slurry.
FAQs
How long does it take to grow morel mushrooms?
It usually takes between one to three years for an outdoor spore slurry to produce its first crop of mushrooms. The underground network needs time to establish itself.
Can I use dried morels for a spore slurry?
Yes. Dried morels still contain viable spores. Rehydrate them in non-chlorinated water for a few hours before blending them into your slurry mixture.
Will morel mushrooms grow back every year?
If the soil conditions remain favorable and the host tree roots continue to provide nutrients, a successful morel patch can fruit in the same spot for several years.
Do morels need sunlight to grow?
Morels prefer dappled sunlight or partial shade. Direct, intense sunlight will dry out the soil and stop the mushrooms from developing.
Can I grow morel mushrooms indoors?
While some commercial facilities have developed patented indoor growing methods, it is exceptionally difficult for home growers to replicate these exact environmental controls. Outdoor cultivation remains the most practical method for beginners.